English/ Español
Step 1: Download APP

If you already have your access credentials, you can omit steps 2 and 3 of this guide.
Otional: To modify or add a description for you vehicle(s), follow these steps:
- Go to the main menu.
- Select "Lugares."
- Hit edit icon in the right.
- Change vehicle description.
- Finally, hit "Update".
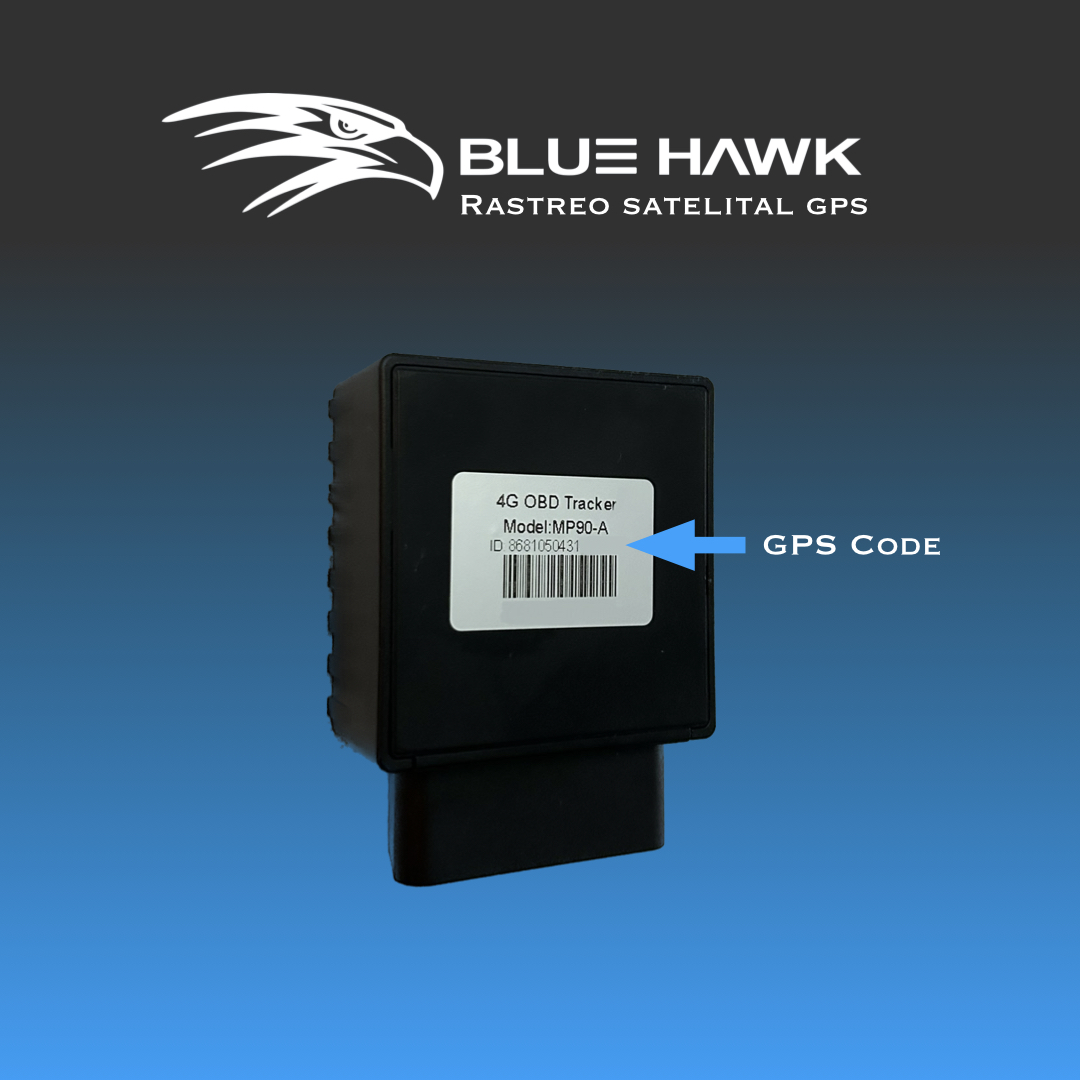
Step 2: Identify GPS Code

Once you receive your GPS unit, you will be able to locate the “GPS Code” or barcode number that you will need to register it on the platform. It is important to make sure you enter the code correctly when registering.
Important: Be sure to enter your “GPS Code” correctly. It is recommended to double check before clicking “Register.
If applicable: To add additional vehicles/ GPS, visit bluehawksecurity.net/login.html in your browser. Log in with your access credentials, then go to the menu and select “Devices.” Under “Devices,” click the “+” button and enter the GPS code and vehicle/GPS description. Finally, click “Save” to save the data.
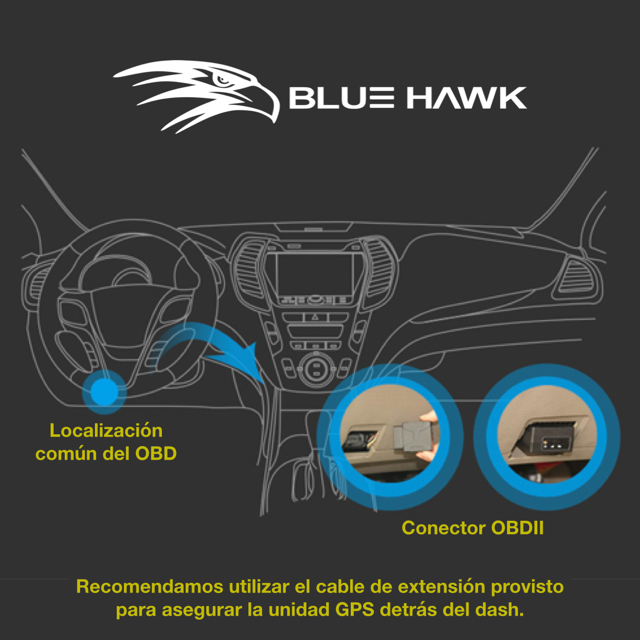
The OBD port or connection on your vehicle is where you will need to connect the GPS unit. If you are unable to locate the port, please contact us at 787-407-0286
Step 5: Connect GPS

Optional: It is recommended to first connect the GPS to the extension cable provided, then connect the cable to the OBD port of your vehicle and finally secure the GPS unit behind the dashboard with straps.
Next


